Step 1 – Sanding and preparation
Before
you start sanding back to the bare timber, you need to remove or
countersink any screw or nail heads that protrude. The sanding itself
takes several stages, depending on the floor’s overall condition, and
there are a few important things to take into consideration:
1. Is the floor solid or engineered?
If your floor has already been sanded in the past, can it take any
more? You might need to remove a section of the door threshold or
skirting board to find out.
2. For drum or belt sanding, you need to decide which grit grade you need.
This also depends on the condition of the floor as a whole. If it’s
badly worn and uneven, you’ll probably have to start with a rough
sandpaper followed by successively less rough papers. You can get
sandpaper in grades 16, 24, 36, 40, 50, 60, 80, 100, 120 and 150, with
16 the most aggressive and 150 the finest.
Most sanding
jobs start with around 36 or 40 grit sandpaper, working up to around
120 grit for the final sand. If you or your contractor aren’t using a
dust free sanding machine, remember to remove all the dust with a vacuum
cleaner between every sandpaper grade change. If possible, save some of
the fine sanding dust for later, you’ll need the finest stuff later on,
if your floor needs filling.
Start in the middle of
the room and work your way to the edges. Guide the sanding machine
carefully around the floor at a middle-range speed, keeping the speed
constant and remembering not to leave the machine on one part of the
floor for too long, which can lead to difficult-to-even-out gouges.
What
about the grain? It’s always best to sand with the grain rather than
against it, which can leave you with a slightly furry finish because
you’re disturbing the grain instead of going with the flow. If it isn’t
possible to follow the grain because of the way the pattern is laid,
there’s a way to overcome it:
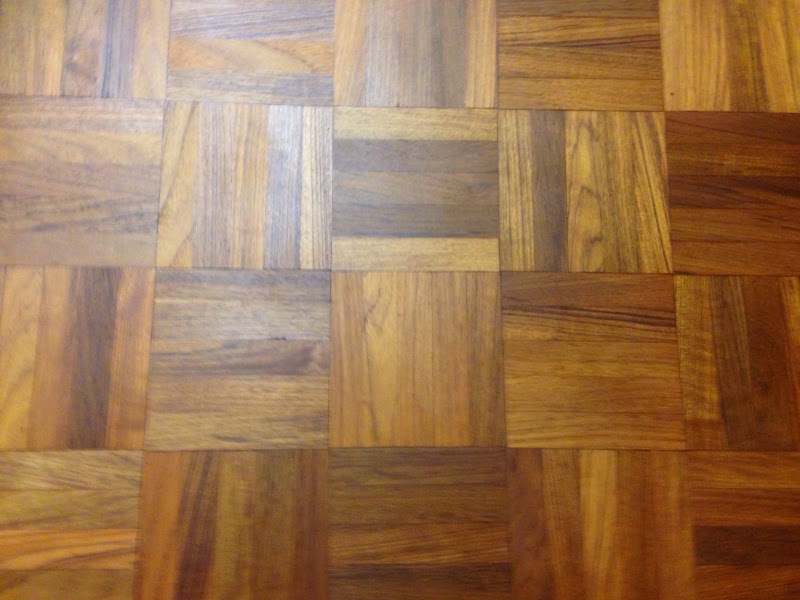
- For complex herringbone pattern floors, sand in the same direction as the light source.
- For Parquet flooring, sand at a 45 degree angle to the pattern.
Once the central area of the floor has been sanded,
it’s time to tackle the edges. This is where edge sanding comes in,
removing old finish from the room’s perimeter where the belt or drum
sanding machine won’t reach. Kick off with a 36 or 40 grit paper then
work your way up to the finest.
It’s best to work in
gentle, slow circular movements, working your way steadily through the
grits from heavy to light. If you miss out grit levels you could end up
with a strange-looking halo effect, which shows up even more when you
apply the wood finish.
Merv, our resident sanding
expert says “When sanding herringbone or Parquet flooring, it’s always
important to sand in the direction of one set of the blocks, usually 45
degrees to the room. Be sure to apply the lacquer in the same direction,
this will help prevent demarcation lines (sanding marks) in the final
finish.”
Step 2 – Mixing and filling
You should have plenty of
fine sanding dust left over from your efforts, created by the 80-100
grit sandpaper. It’s exactly the right colour to match the floor so mix
it with a clear wood filler gel such as Bona mix and fill or Fiddes Wood
Filler Gel and use it to fill any small holes or gaps between the
planks or parquet tiles, anything up to 6mm. If you have bigger gaps,
fill them with a one or two pack wood filler instead.
Step 3 – Buffing to a high sheen
You
need to carry out a series of final sands to smooth your repairs and
make the surface finish-friendly. Use a circular motion and bring 100
grit into play, followed by finer 120 or 150 grit grades. Remove all the
dust in between every stage, otherwise residue from the rougher papers
can catch under the sander and leave nasty scratches.
Step 4 – Applying wood finishes to floors
Staining

- Products like Morrells Light Fast Solvent Wood Stains are great for
delivering beautiful wood grain definition and an excellent overall
colour. Because they’re spirit based and dry pretty fast, it’s best to
only apply them to a small area at a time to avoid patches. Take it easy
and you should be fine.
- Apply your stain with a brush, rag or special mohair pad. Get rid of
any excess with a clean, dry cloth to help the final lacquer finish
stick properly.
- Never use an exterior wood stain designed for decking, fencing or
garden furniture, since they contain water repellents which also repel
water based floor lacquers.
Sealing
- Always choose a water based floor finish that includes a
primer/sealer, designed to enhance the wood’s natural colour and reduce
the risk of ‘side bonding’, where the planks or parquet tiles get stuck
together. If the wood shrinks – which it often does because of
atmospheric conditions, central heating and seasonal temperature changes
– the lacquer film gluing the wood together cracks, which looks awful.
- Apply your sealer with a t-bar applicator or a short pile mohair
roller. Apply the sealer thinly and evenly and don’t put pressure on the
roller. Be gentle, applying no pressure, and let the roller do the job
it’s designed for.
- When the sealer is completely dry, which usually takes anywhere
between two and four hours, you can apply your first layer of
water-based topcoat. You don’t need to do any more sanding.
Lacquering
Did you know that varnish and lacquer are the same thing? The trade tend to refer to varnishes as laquers while the public more commonly refer to these products as varnishes.
- Again, use a t-bar applicator or a short haired microfibre roller to
spread the product evenly over the floor. Remember not to use any
downward pressure, instead letting the roller do its job. If you press
down you can form annoying pools of superfluous lacquer.
- Leave 2-3 hours to dry completely, after which you should sand the
lacquer with a rotary sanding machine (often called a de-nib) and a
150/180 mesh screen.
- Clean off all the dust and debris and you’re ready to apply the top coat.
Top coat
- Do you use a single pack varnish such as Manns Floor Varnish or a 2
pack lacquer system such as Manns 2 pack Lacquer? And do you choose a
matt, semi-mat, satin or gloss finish? As a rule your lounge, bedroom
and so on are best given a coat of something like Manns water based
Floor Varnish or Bona Mega while hallways, bathrooms, kitchens and other
heavier wear areas will benefit from Manns 2 Pack water based varnish
or Bona Traffic HD. That said an additional coat of 1 pack lacquer is
also a common way to finish high wear, residential areas.
A typical domestic application in 7 steps
1.Apply one coat of sealer or primer onto the pre-sanded surface
2.Let it dry for 2-3 hours
3.Apply one coat of floor varnish by microfibre roller or floor finish applicator
4.Let it dry for 4-6 hours
5.Rotary sand the surface with 150/180 grit paper and remove the dust (de-nib)
6.Add a second coat of water based floor lacquer, again using a roller
7.If you want a deeper, fuller finish, you can apply a third top coat of varnish.
Oiled floors
Instead of sitting on the surface of the wood, oils sink in for a warmer, more natural look. Here’s how to achieve it.
- Sand through the grit levels until you reach 120, which leaves the wood’s pores open enough to accept an oil finish
- Apply a thin coat of oil using a mohair roller, floor applicator pad, lint free cloth or special solvent-safe squeegee
- Leave it to dry for 4 to 8 hours depending on the product being used
- Lightly sand or de-nibb the floor with a scotch pad or fine grit paper
- Vacuum to remove all traces of sanding dust created when de-nibbing
- Apply a second thin coat of oil
- Wait 12 hours for everything to dry and settle
- If required, buff your floor to improve the sheen
Sourced from: http://www.wood-finishes-direct.com
Art of Clean are specialists in:
Working for domestic or commercial clients throughout Cambridgeshire, Essex, Suffolk and Hertfordshire.
For more information about our services please contact our friendly team on
01223 863632 or visit www.artofclean.co.uk.

 However, as this ladies dining chairs had a very unique and large base another solution was proposed by Pierre: